• Skip to primary navigation
  • Skip to main content
Steve Young

Steve Young

Reveal Your Greatness Within

  • Home
  • About
  • Work with Me
  • Speaking
  • Media
  • Free Resources
  • Book a Consult

physical therapy and injuries

Kinesio tape for shoulder stability

February 14, 2013 by admin

Kinesio tape for shoulder stability or KT tape is great while you have issues with your shoulder.


Before using the KT tape for shoulder, first you want to use alcohol to scrub the skin, front of the shoulder to get the oil off the skin. First you want to half about 2 inches of the tape. First two inches goes to the neck here, no tension just stay calm.


Leave last two inches, anchor tight and pull and this will be a 100% pull and stick to temple rubber. The last two inches of the kinesio tape with no tension. You can use the rough part, the back part of the holder, you want to rub fast that generates heat which often stick.


Read More: Shoulder health for swimming


The second piece of this kt tape just cut like this with 2 inches together and cut in half, you want to tip off here and take that off. Right where you go the other end, rub that out without tension. Then we will take one strip, anchor keeping a pull of 50% tension and place on the front of the shoulder. The last two inches with no tension, so the kt tape goes over front of the shoulder.


The back one, keep 2 inches no tension, anchor, pull about 50% back here and no tension above. If you look from the side, it almost like a weird drawn shape. Continue with the rough part of the back here, continue rubbing. That will activate the glue and make it stick.


The last piece from this kinesio tape, the two torn pieces were 9 inches, the longer piece was 12 inches. Tear off at 2 inch, for this one turn your arm out forward like this, palm is facing forward. This goes there no tension, on the shoulder muscles line here, it goes right over there.


Make sure last two inches no tension, anchor make sure your arm is turned out facing forward. 50%, it should come down at an angle little bit and then the last part. Rub it in, what you can do in home is use a blow dryer and heat up the tape to activate the glue.

More on fitness:

Proper posture dictates spinal health


knee stability exercises progression – Video


This technique works extremely well to help the shoulder stabilize so you can exercise without shoulder pain.

Where to buy kinesio tape

You can get the tape at Amazon.com by clicking on the tape below:

Filed Under: physical therapy and injuries

Low back pain and stiffness resolved

February 1, 2013 by admin

Suffering from low back pain?

Do you sit for long hours? Low back pain relief by doing these simple low back pain exercises below.


Do these low back pain exercises daily for lower back pain and relief stiffness from the back muscles. For the stretches, do 5 sets of 30 seconds.  For strengthening, do 2 sets of 15 Without knowing your exact condition and the reason for back pain, these low back pain relief exercises should help in general. If you have pain with sitting and no or reduced pain with walking, skip the double knee to chest exercise.

Standing HIP ER Stretch

In this video we are going to go over with hip standing external rotator stretch for lower back pain relief. You need a surface around this height, it could be little bit lower, little bit higher. If the height that you are using is too high, you can just stand on a stool or couple of books.


So we are going to use this surface, I wanna stretch my right leg, you wanna bring that leg on right on top of the table. You wanna make sure you get your leg from the inside not outside. It is much harder from the outside than to in.
You wanna place your hips square to the table, your knee should be right in front of the hip. It should not be angled out like this. It should be angled forward.


Now couple of things if your hips is tight, this knee will be sort of up like this, that’s okay. You want to relax, you do not want push the knee down. You always want to make sure that your hips stay square because if you are tight your body wants to turn away from the side that you are stretching.


In this position you should feel light stretch here. Now if you are very flexible and do not feel stretch in this position then you want to make sure your chest forward and bow forward.do not round your chest to bow forward, keep your chest up and bow forward. That will give you a stronger stretch.


Now if you are very flexible you still don’t feel the stretch, you can drop the other foot further back away. That will basically lower your body, increasing the height of this and places a stringer stretch on the hips.


I will show you from the side view to show you what I mean by that. So in this position you will bow forward keeping your back flat to get that stretch. You can also drop your other leg back to get a stronger stretch.


You wanna make sure the intensity of the stretch here is not too strong, it should be medium, medium to strong stretch. Ideally you want to hold for 30 seconds and it should not be painful. By doing this there should be no low back pain.

The cat or camel exercise

Today we are going to demonstrate the cat or camel exercise. This exercise is for for low back pain. For this you will be on your all fours on your hands and knees. You might wanna use something for your wrists, you might want to hold on to dumbbell.


Just a better position for your wrist to be in less strain. So for this exercise you going to be arching your back. Kind of round when they are out, in this position you want to tighten your stomach and breathe out. This is the cat position and then you are going to let your abdominal muscles to relax and sag your stomach down to the table as low it will go.


So you are versing the curve in your lower back, again repeat. You are going to round up your lower back and sag down let everything stretch. The bottom you should be breathing in. This is your Cat or Camel, low back pain exercises.

The Side Lying Trunk Rotation

We are demonstrating the Side Lying Trunk Rotation so for this low back pain exercise you are going to be lying on your side with your knees bent towards your chest. So both foot should be bent one foot on top of the another. For this lower back pain exercise one arm is going to reach up for the ceiling. Like this. Now you are going to allow your arm to drop behind and lowering it towards the floor so you are going to let your body, upper body follow your arm and your knees are still bent maintaining contact with the table.


For this back pain or core exercise if you have shoulder problems or this particular position strain on your lower back so it can be modified with your elbow bent so roll back to your side. So we can bent the elbow keep to close to your side, to your body and now rotate. So that if you have shoulder problems or if the arm extended put so much strain on the lower back and that is the Side Lying Trunk Rotation.

Filed Under: physical therapy and injuries

Secret to pain free body – finding balance in life

November 15, 2012 by admin

The Secret To A Pain Free Body

In this video I am going to tell you a secret of how to have a problem free body by finding balance in life. We just went through the last decade where everything was extreme, hard core people were pushing it to the max. I can tell you that the I have seen the results of that life style which is people get hurt, people get injured, people doing extreme diet, they cannot handle it and come back to the way they were eating, which is pretty bad.


find balance in your lifeThe secret is finding balance, it is not a secret, it is something from the Eastern Culture have discovered thousands of years ago. Just listen to the body and what the environment telling you. Now I will tell you what I mean buy that. When you are doing a workout, it is so hard that you are going to throw up, that is actually not good.


Examples that you are not finding balance in workouts


When you throw up it is your body’s response of saying you were going to hard. You do not adapt to that workout. Whoever told you that workout, whoever teach you that workout it means they did not prescribe the right level of workout for your body.


So throwing up is not good, another example would be, picking out your currently eating. May be not eating breakfast that much, may be you are having wrong snacks and other stuff. And going and trying to eat like a cave man or some type of low card diet or cutting out this or cutting out that. That’s not finding balance.


Finding balance is about doing small changes, doing what you can and working with your body and working with your mind. When you find balance that is much more sustainable, much healthier, and much better for your mind and body.


Another example would be, if you are looking to stretch a certain body part or if you have aches and pain you can go from doing nothing to doing everything at once. Because you tend to overdo it, we treat a lot of people are at opposite extremes, either they do not do anything and they don’t get better or they do too much and actually end of straining the area.


Get your customized Workout here


It’s like stretching, you can’t stretch extremely hard hoping to get faster flexibility. When you stretch too much you end up causing strain and inflammation. What is all go back to is finding balance, so when you are ready to training, eating a certain way, you can really apply this to anything in life.


It’s about finding balance, that’s a secret. It’s not about pushing to extremes, enduring symptoms in your body. Always listen to your body, is going to tell you what you need and what you should not be doing.


Oh, if you have questions, just go to our FB page here https://www.facebook.com/bodySolutionsinc and ask!

Filed Under: physical therapy and injuries

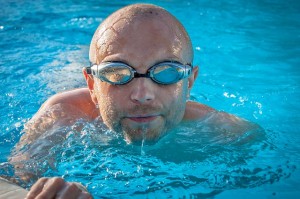
Shoulder Health For Swimming technique and High Performance

November 2, 2012 by admin

Improve Your Swimming Performance With This Shoulder Tip

Hey, this is Doctor Steve Young from bodysolutions where total body fitness is governed by physical therapists. In this video we are going to talk about shoulder blade positioning or your posture in terms of swimming technique, swimming performance and shoulder safety.


You see wherever your shoulder blade sits that’s dictated by your posture. in terms of your mid back if your posture slouched, your shoulder blades tilts forward. If you have good upright posture your shoulder blade tilted straight.

How shoulder dictates your swimming technique


And how this effects your swimming stroke technique is that, if I have good posture you see I can lift my arm up, my shoulder goes all the way up. I can easily go all the way around.


Now what I am going to do on purpose slouch, if you notice when I go this is as far I can reach my arm. This is with good posture, this is with bad posture. And the reason you cannot lift your arm as high in a slouch position because this bone called acromion is forcing your shoulder down.


So when I come up, this is as far my arm can go because this bone is hitting this bone if I tilt my shoulder weight down it makes this bone which your arm right here took down as well.


shoulder health for swimming techniqueNow the problem with this bad swimming technique is that every time you do this stroke with your shoulder blade not only your stroke distance decrease also there is a higher chance of injury. You see when you jam this bone against this bone there is few different soft tissues in between these bones. One of them will be your rotator cuff tendons, there is bursea, there is also the bicep tendon right here. Any one of this structures can be inflamed when you are in this improper posture.


Because you are kind of grinding your shoulder every time. It’s extremely important to be aware of your posture also in your exercise program designed to open up your shoulder blades. You see a lot of us get tightness in pec muscles right here, specially the pec minor which is under the pec major most people know it as the chest muscle.


Muscle that starts right here and connects to third, fourth and fifth rib. If this muscle gets right, it will pull your shoulder blades into a forward or anterior front tilted position. That’s the worst thing that you want as a swimmer.
A lot of swimmers do get that position. These muscles do get trained heavily and if you do not stretch it pulls your shoulder blade to the worst position possible. So how do you reverse that?

How to correct your shoulder posture for better performance


There is a few strategies on daily basis to improve your swimming technique. One way is to find a door away, keep your hands against it, and lunge forward to get these pec muscles to stretch back. It will get the pec major muscles and it will allow your shoulder blade from this position to go back to the proper position.


Another would be for pec minor stretch, you would just go on the floor, on the back. Brace your abs, like you are doing crunches just tighten your ab and just take a broom stick and just flex your shoulder overhead.


Its going to allow your shoulder to tilt back. What is important that you keep your abs right that is going to prevent your ribs from being pulled up. Remember the muscle pec minor is attached to your ribs so you need to anchor your ribs down while you are getting your shoulder blade to tilt back up.

What are passive and active stretches for improving swimming technique


These are two sorts of passive stretches. An active stretch to do before you swim is simply is more like a dynamic way to warm up the muscle is just to lunge forward and throw your arms up. What this does is kind of activates the muscle, the muscles are working and stretched at the same time. And how it has different effect than the passive stretches where you just kind of hold for 30 seconds.


This active stretches not only warm up the muscles, not only stretch the muscles it kind of prepare your body for action. They prepare our proprio receptors. They are little sensory fibres in your muscles and in your joints that senses position changes. And these proprio sensors are extremely important for all sport movements because they are the feedback mechanism of your body.


It’s the only way for your brain to know where your arm is at space without you staring at your arm. So those proprio receptors needs to be warmed up just like the muscles needs to be warmed up. So we have the passive stretch this way, on your stomach with sort of your stomach braced with a broom stick.


And with an active version where you kind of throw your arm up before you swim. And while you are swimming focus on keeping the good posture so your mid back is arched up and not rounded down. I hope you find this tips very helpful.

Filed Under: physical therapy and injuries

Martial Arts Injuries?

July 11, 2012 by admin

Get rid of your nagging pain without expensive medical costs or wasted time trying things that just don’t work.

boxing-606193_640

Filed Under: physical therapy and injuries

  • « Go to Previous Page
  • Page 1
  • Page 2

Let's Play Together to Evoke Your Superhuman Powers

Book a Consult

DISCOVER WHAT'S NEW IN STEVE'S LIFE:

Facebook Youtube Linkedin

Join the Community of Fellow Ammortals:

Join Facebook Group

Get Instant Access to “Wisdom Words” that Unleash your Full Potential

Control Stress and Anxiety, Manifest your Desires, and Program your Subconscious with our Actionable 3.5-Step Coaching Course

Get Instant Access to the Program

Terms and Conditions | Privacy Policy | Copyright 2025 Dr. Steve Young